User Guide > Working with projects and projects files > Change a project settings > Set an extended autorun options
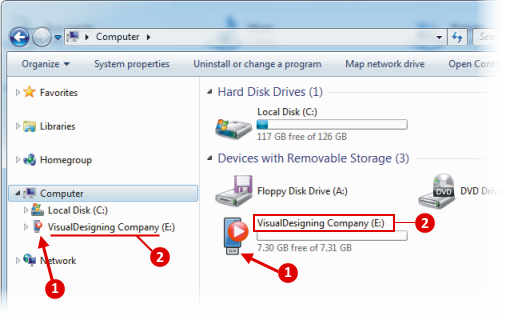
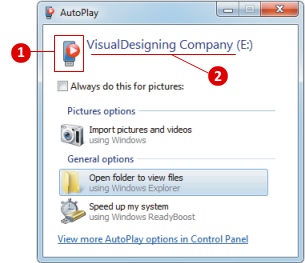
You can change a standard icon of your disk. It's the icon that will be displayed on your disk under 'My Computer' in Windows Explorer ![]() or in the AutoPlay dialog box while the disk is inserted. By default the standard drive icon is used.
or in the AutoPlay dialog box while the disk is inserted. By default the standard drive icon is used.
Also, If you set a disk label, it will appear under 'My Computer' in Windows Explorer ![]() when your disk is inserted, unless the disk is already created with a disk label.
when your disk is inserted, unless the disk is already created with a disk label.
|
|
To change a standard icon of your disk and set a disk label
1. On the Project menu, click Settings, and click the General tab

2. To change a standard icon of your disk ![]() :
:
Select the "Change a disk icon" checkbox , select the filename containing the icon by using the browse button ![]() . You can use the following file formats:
. You can use the following file formats:
| • | ICO - is an image file format for computer icons in Microsoft Windows. |
| • | BMP - Windows bitmap (*.bmp) |
| • | EXE - Executable file (*.exe) |
| • | Dll - Dynamic-link library (*.dll) |
If the file contains multiple icons, use the Index box to select one of it.
3. To set a disk label ![]() -select the "Set a disk label" checkbox and type the text of the label.
-select the "Set a disk label" checkbox and type the text of the label.
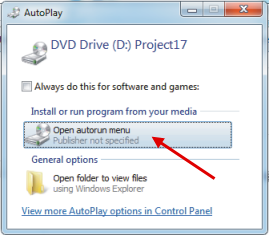
4. Moreover, for CD/DVD disks you can type the action name ![]() that will appear in the Autoplay dialog box.
that will appear in the Autoplay dialog box.