User Guide > Working with behaviors > Working with events and actions
Events and actions are the core mechanism to provide interactivity to your application. Running executables, opening files, playing sounds, switching to other pages and windows of the application, sending e-mails or opening certain URLs are all actions you can perform when a user clicks some object on the screen, moves the over it or if some more complex custom conditions are met.
Basically, an action is some function the application performs in response to some event. And the event is a condition or a set of conditions that trigger an action. For example, when a user clicks the Browse button, the mouse click is an event and opening the file dialog is an action.
To assign some action to an object, select this object in the Project Panel or on the Artboard. Then switch to the Actions section in the Properties Panel and click the Add action button.
![]()
This will open up the “Event | Action properties” window.
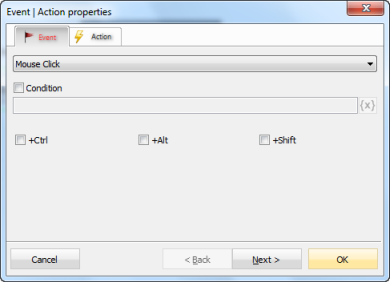
The Event tab allows you to choose an event that should trigger the action. Different objects have different available events. For example, buttons have Mouse Click, Mouse Enter and Mouse Leave events. Some events have additional parameters. For instance, mouse actions allow you to specify keyboard modifiers - Ctrl, Alt or Shift keys. Some event parameters are obligatory, like the Timer name parameter of the Timer event.
Below the event selection of the dropdown list you can configure additional conditions for this event (see below).
The Action tab allows you to assign an action to the object. This action will be executed every time the corresponding event triggers.
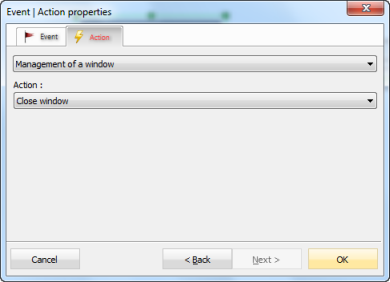
There are many action categories available in Autorun Menu Designer. Management of a window, for instance, allow you to close, minimize or restore, show and hide windows of the application. Choose the desired category and the action you want to perform. Click OK to save settings and add the action. You can edit the action later in the Properties Panel, under Action section:
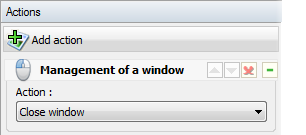
Clicking on the icon of the action in the Properties Panel will edit its event, and clicking on the name of the action modifies the action itself. You can also adjust the order of the action or delete it. For more information, see Properties panel.
Here is an example. Let’s suppose we want to switch to another page when the Next button in our application is clicked. So, first we select the button object in the Project Panel:
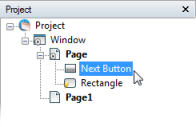
Switch to the Actions section and click the “Add action” button:
![]()
Select Mouse Click as an event to trigger the action and click Next.
On the Action tab, choose the “Open page” category:
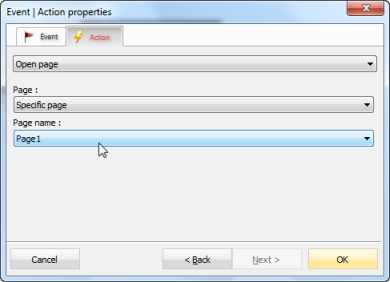
In our example we want to open a specific page, so select “Specific page” and choose Page1 below. Click OK to save your new action.
That’s it! Preview your project to make sure the button does switch to Page1.
You can assign multiple actions to an object. They are executed consequently starting from the topmost ones. The order of actions is significant if several actions are assigned to the same event, or if several events trigger simultaneously.
Conditional Execution
In addition to normal events, you can check for other conditions as well. Conditions are expressions involving constants, variables and functions. The condition is met when the expression it is described with evaluates to True.
Here are some example expressions illustrating this principle:
2=1+1 (always evaluates to True)
Image1.Visible (evaluates to True if Image1 is visible, otherwise evaluates to False)
(Var1 + Var2) = Var3 (evaluates to True if the sum or concatenation of variables Var1 and Var2 is equal to Var3)
[EditBox1].Text != ‘’ (evaluates to True if the text field has some symbols in it)
Let’s make the above example more complex. Suppose we want to switch to another page only if a user has agreed with the terms and conditions listed on the screen. This means the checkbox indicating the acceptance of the terms must be checked.
To modify our event, select the NextButton object and switch to the Actions section. Click the icon to edit the event. Now we need to specify additional condition to the event. Turn on the Condition option and click the [![]() ] button to open the variable selection window:
] button to open the variable selection window:
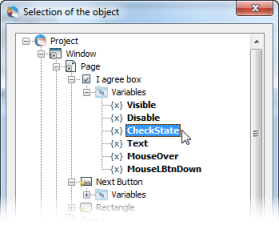
We need the CheckState variable of the "I agree box" object.

Well done! The additional condition is set.
You can use more complex expressions to check for various conditions. You can combine user variables, internal variables and functions to implement many different ways to interact with the user.
See also